Saturday, 4 May 2013

HACK WITH USB DRIVE


HACK WITH USB DRIVE

Making an Auto-Hacking USB Drive


You need two things:
1) A USB Drive devoted to this
2) The programs and files that I will show you how to make or where to get. If you have trouble making the two files that I show you how to create, they can be downloaded at the end of the Instructable.

OK GUYS!!!!!
THIS AUTO-HACKING USB DRIVE SIMPLY CONTAINS APPLICATIONS THAT RECOVER PASSWORDS AND SUCH. STOP LEAVING POSTS ABOUT HOW YOU DON'T UNDERSTAND WHAT GETS HACKED.
A Brief Explanation
OK. If you are looking for an Instructable that will teach you how to hack the Pentagon with a 2GB USB Drive, look somewhere else. This Instructable uses a batch file, an autorun file, and downloaded programs.

The Autorun File

So. Here we go. We will start with the Autorun file.

This file is the one that makes the pop-up window when you plug in the USB Drive. You can use this on any USB Drive, even if it has U3 on it.

Open Notepad (I'm using Notepad++) and type the following:

(autorun)
label=(Name you want the drive to have)
icon=(Icon file).ico
open=(Batch file we will make later).bat
action=(What you want the action to be)

MAKE SURE YOU DO NOT TYPE THE ()'s! Where it says (autorun), replace the parentheses with brackets (the buttons to the right of the "p" key on the keyboard. USE THE BOTTOM BRACKETS, NOT THE TWISTY FRENCH BRACKETS!)

Save this file as Autorun.inf

Make sure that you save it immediately inside your USB Drive, not inside any sub-folders (My Computer, Autohax0r).

Also, I have used an icon (an .ico file), so the USB Drive will have a different picture than the boring standard picture. To get one of these, I advise going to http://www.iconarchive.com/ to get an .ico file (you have to specifically download it as .ico). If you do this, save the icon in the same place as the Autorun file.

The Batch File

We will now make the batch file that starts all the "hacking programs." MAKE SURE YOU NAME IT THE SAME AS WHAT YOU CALLED IT IN THE AUTORUN FILE!

Type this into Notepad:

@echo off
title KTX
start .\Applications\FOLDER\APPLICATION.exe
start .\CommandLine\Process.exe -k TermX.exe
start .\CommandLine\Process.exe -k WinVNC.exe
pause
goto eof

I will explain the commands used:
@echo off: Makes it so the file pops-up without showing the commands. Makes it look more professional.

title: Makes a title at the top of the batch file.

start: If you can't figure this one out, you should not be reading this Instructable.

pause: Pauses the file, waits for you to press any button.

goto: Sends the file to a different part of the script.

eof: End of file.
Also, TermX.exe is a program that my school uses to keep us out of certain websites. IT IS NOT THE FIREWALL. For info on WinVNC.exe, go tohttp://www.processlibrary.com/directory/files/winvnc.

Where it says \FOLDER\APPLICATION, you will change this in two steps.

Save this as KTX.bat, and place it in the same place (directory) as the Autorun.inf file.

The "Hacking" Programs

Ok. We are now going on to the actual hacking programs. Go tohttp://www.nirsoft.net/, and browse the programs. If you have any different websites or programs, feel free to use them. I am using SniffPass, LSASecretsView, and WirelessKeyView. Install them, and place them and the folders they create in the same directory as all the other stuff.

Your computer might identify some as viruses, but don't worry. It only does this because some programs can find certain passwords.

Also, you might notice that I have a folder called "CommandLine." This is a VERY usefull program, and can be downloaded athttp://www.beyondlogic.org/solutions/processutil/processutil.htm. There is also a hearty description at this page.

Modifying KTX.bat
It is now time to go back to KTX.bat (by the way, remember that TermX.exe thing I mentioned? Well, KTX stands for "Kill TermX". Feel free to change the batch file name to whatever you want, just MAKE SURE TO ADJUST THE AUTORUN FILE, TOO!).

Go to the part of the Autorun file where it says "start .\Applications\FOLDER\APPLICATION.exe". You are going to change this. Also, add or subtract as many of this line as you need. If you have three programs to run, you need three lines of this code.

First, create a folder in the same place as the Autorun and KTX files, and name it Applications. Drag all the folders that contain the hacking programs into the Applications folder. You should come up with a directory like this:
"My Computer\AutoHax0r\Applications\HACKING FOLDERS HERE (with programs inside the folders)"

All Finished!
Ok. This is the end of the tutorial. You should have the Autorun.inf file, the KTX.bat file, and some hacking files of your choice. To work the magic of the Auto-Hacking USB Drive, just unplug the drive in question and plug it back in. If it doesn't work, you did something wrong, because I told you how to do it right. Either that, or you have strange computer settings.

If you are confused as to how to make the batch file or the Autorun file, download them here.

http://www.instructables.com/files/orig/FEB/JDAP/FLKJYGAK/FEBJDAPFLKJYGAK.zip

6 Websites To learn Coding As a Beginneer to Expert.


6 Websites To learn Coding As a Beginneer to Expert.


Hi Friends, Today we will see 6 Usefull Websites to learn Coding , Today i m presenting you 6 websites which will help you to learn coding As a begineer and build your way upto an expert Programmer or Developer.
The below Websites will help you to learn CSS, HTML, PHP, JavaScript, CSS3, HTML5, Ruby, etc and it doesn't require any skills .


6 Usefull Websites to Learn coding as a Beginner to Expert.

#1. w3schools -


W3schools is number 1 as it helps beginners to learn code from A to Z.
All You need to do is just go to W3schools and select a tutorial of the language you want to learn, then take a cup of coffee and start learning.

No skills required.
You will learn > HTML/CSS (HTML5/CSS3), Javascript, PHP, ASP, XML, AJAX, jQuery


#2. Codecademy - 


Codecademy is a best alternative to W3schools, with Codecademy you can learn any language and start programming in a funny way.
No skill required.
You will learn > HTML/CSS, PHP, jQuery, JavaScript, Python, Ruby


Same as Codecademy, Code avengers provides an easy to use platform and its a funny way to code and gain experience. it comes with 3 Levels that a user have to pass them to become a full expert.

No Skills Required
You will learn > HTML/CSS (HTML5/CSS3), JavaScript


#4. CodeSchool - 


Codeschool provides you a very easy to use interface, Design, and not much unwanted text.

No skills required.
Language you will learn > HTML/CSS, Ruby on Rails, JavaScript, iOS


#5.TeamtreeHouse - 


Teamtreehouse is very similar to Codeschool which provides you simple and easy way to learn Coding.

No skills required.Languages you will learnHTML/CSS, iOS, Android, Wordpress


#6.Dreamincode - 


Last one is Dreamincode, many developers and programmers have taken thier knowledge from Dreamincode. the only thing is the interface is a bit boring and plenty of text as well.

No skill required
Languages you will learn> C++, Java, VB, VB.net, C#, PHP, ColdFusion,

Thats it, Try these Sites to enhance your coding knowledge, Very usefull For beginners.


Thank you .

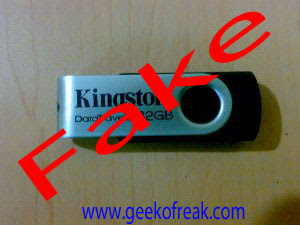
Check Whether Pendrive Or Memory Card is Original or Fake


Check Whether Pendrive Or Memory Card is Original or Fake


Hello Everyone, Recently Google adsense approved my request on monitering good traffic and usefull content on the site. I must thank you all For This.


So today we will see how to figure out if the Pendrive or Memory Card you Bought is REAL or FAKE.

Manny times we tend to buy a memory card or a pendrive with high data storage and with very cheap price.
People Sell Pendrives and memory card at a very cheap prize claiming that it has very high data storage capacity.

But believe me its just a SCAM.
One of my friend bought a pendrive on the roadsite for just 300rs and he claims that its a 32gb pendrive,
when he came home and inserted his pendrive started copy pasting, he realized that the pendrive dont have space more than 1gb.


So This type of scams happens everywhere . we have to find a way out of it.

So to find whether your bought pendrive or memory card is original or fake you have to follow below steps.


Step 1: Download h2testw.zip File.


Step 2: Extract it to get the exe file.

Step 3: Start it , Click on Select Target and Choose Your pendrive or Memory card (Make sure that it is formated Before using this tool )

Step 4: Now you have to click on Write + Verify and wait for few minutes while it complete the process.

Step 5 : After Completion it will show you a message Complete without any error, It means you pendrive or memory card is original and have no problems.

But if it Finds Errors , then it is fake and have problems.


So today we saw an easy way to Check whether Pendrive or Memory Card is Original Or fake.

I hope it will help you.
You can now subscibe to our daily posts via email to keep in touch.


Thank you.
:)

How To Access Blocked Web Sites


  How To Access Blocked Web Sites??


Hello Friends,

How's You Today, Today we will see How to Access Blocked Web sites.
Specially in School and Colleges, Social networking sites and Youtube are normally blocked.
We have to spend whole day in colleges, Most of the colleges and schools have internet connection but the main problem is that,They block Websites which we Really Want for Entertainment.
So,  today we will see the solution to this problem.


There Are Many Tricks But We Discuss Only Two Tricks Here Which Can Really Helpful For Teenagers And Officers.

1) Through Website IP Address
2) Through Proxy Websites


1) Website IP Address:-
In this Trick we open websites through Ip address of that website. All websites have Thier own Ip address.but now you must be thinking how to get Ip address of websites, no dont worry i will help you out.


Carry out all the below steps to find the Ip address of websites.

Step 1:- Open CMD Through Start program.

Step 2:- Write "ping"  give space and type website name there.For eg : ping www.facebook.com

Step 3:- Then Press Enter.You Can See One Window Like Below.


Step 4: As you can see in the above picture,after doing 3rd step, you get the ip address. now enter that ip address in the address bar in you Browser, press enter. thats it.

Note : Manny a times websites are blocked along with their ip address, so if ip address of the site are also blocked then you can open that particular site.

But here is another trick to access blocked websites even if websites and their ip address are blocked.


2) Proxy Websites:-

In This Trick You can Access any Websites Through Proxy Websites,
Here are some Proxy Websites


Just open these sites, Enter the Url of Blocked website which you want to Access, For Eg: "www.geekofreak.com " then press enter.
Thats it That blocked websites is now Ready for you To access.

That's All

Bonus Tip : The Above 2 tricks will definately worked for you but You can even Use Tor Browser to Surf Anonymously and through that browser you can even open blocked websites.

I believe this article will help you,
 I ask you to plz make use of social plugins, share it, tweet it, Recommend this.
Thanks :)

Collection of Run commands for windows


Hello everyone,Today we will see all Run commands that can be used in you windows pc.
These Run commands will help you to run the Program without any difficulties.
just click on start>run and type the run command for that particular program you want to run. thats it.


Following are the program name and thier Run commands.

 [A] 

Add/Remove Programs = appwiz.cpl
Administrative Tools = control admintools
Authorization Manager= azman.msc "New"

[C]

Calculator = calc
Certificate Manager = certmgr.msc
Character Map = charmap
Check Disk Utility = chkdsk
Control Panel = control "New"
Command Prompt = cmd.exe
Component Services = dcomcnfg
Computer Management = compmgmt.msc = CompMgmtLauncher "New"

[D]


Date and Time Properties = timedate.cpl
Downloads = Downloads "New"
Device Manager = devmgmt.msc
Direct X Troubleshooter = dxdiag
Disk Cleanup Utility = cleanmgr
Defragment User Interface = dfrgui "New"
Ditilizer Calibration Tool = tabcal "New"
Disk Management = diskmgmt.msc
Disk Parmelonion Manager = diskpart
Display Properties = control desktop or desk.cpl
DPI Scaling = dpiscaling "New"
Driver Package Installer = dpinst "New"
Driver Verifier Utility = verifier or /reset
DVD Player = dvdplay "New"
[E]


Encryption File System = re
keywiz "New"
Event Viewer = eventvwr.msc
[F]


Fax Cover Sheet Editor = fxscover "New"
File Signature Verification Tool = sigverif
Folders Properties = control folders
Fonts = control fonts
Free Cell Card Game = freecell

[G]

Game Controllers | joy.cpl
Group Policy Editor = gpedit.msc
[I]  

Internet Explorer = iexplore 
Iexpress Wizard = iexpress
Internet Properties = inetcpl.cpl
IP Configuration = ipconfig.exe
iSCSI Initiator = iscsicpl "New"
[K]

Keyboard Properties = control keyboard

[L]

Libraries = explorer or Windows key + E
Local Security Settings = secpol.msc
Local Users and Groups = lusrmgr.msc
Logs You Out Of Windows = logoff
[M] 

Microsoft Support Diagnostic Tool = msdt "New"
Microsoft Paint = mspaint.exe
Mouse Properties = control mouse
Mouse Properties = main.cpl
Mobility Center (only on mobile) = mblctr
 or Windows key + X
[N]
  
Network Connections = control netconnections
Network Connections = ncpa.cpl
Notepad = notepad
[O]

ODBC Data Source Administrator = odbcad32 "New"
Optional Features Manager = optionalfeatures "New"
On Screen Keyboard = osk or
 Windows key + U 
[P]  

Package Installer = dpinst
Pen & Touch Options = tabletpc.cpl
People Near Me Identifier = collab.cpl
Performance Monitor = perfmon.msc
Phone and Modem Options = telephon.cpl
Power Configuration = powercfg.cpl
Printers and Faxes = control printers
Printer Migration = PrintBrmUi "New"
Private Character Editor = eudcedit
Problem Steps Recorder = psr.exe
Programs and Features = appwiz.cpl
[R] 
  
Regional Settings = intl.cpl
Registry Editor = regedit.exe
Remote Assistance = msra "New"
Remote Desktop = mstsc
Resultant Set of Policy = rsop.msc
[S]
   
Scheduled Tasks = control schedtasks
Screen Resolution = desk.cpl
Security Center = wscui.cpl
Services = services.msc
Shared Folders/MMC = fsmgmt.msc
Shuts Down Windows = shutdown
Snipping Tool = snippingtool "New"
Sounds and Audio = mmsys.cpl
Sound Recorder = soundrecorder "New"
Sound Volume = sndvol "New"
Spider Solitare Card Game = spider
SQL Client Configuration = cliconfg
Stored User Names and Passwords = credwiz "New"
Sticky Note = StikyNot "New"
System Configuration Editor = sysedit
System Configuration Utility = msconfig
System File Checker Utility = sfc
System Information = msinfo32
System Properties = sysdm.cpl or
 Windows key + Pause/Break
System Restore = rstrui.exe
[T]   

Task Manager = taskmgr
Trusted Platform Module = TpmInit "New"
[U]

Utility Manager = utilman
User Accounts = netplwiz or control userpasswords2
[W] 

Windows Activation = slui "New"
Windows Backup Utility = sdclt "New"
Windows Fax and Scan = wfs "New
Windows Firewall = firewall.cpl
Windows Firewall with Advanced Security = wf.msc "New
Windows Image Acquisition = wiaacmgr "New"
Windows Media Player = wmplayer
Windows Magnifier = magnify
Windows Management Infrastructure = wmimgmt.msc
Windows Update App Manager = wuapp "New"
Windows Standalong Update Manager = wusa "New'
Windows System Security Tool = syskey
Windows Share Creation Wizard = shrpubw "New"
W
ordpad = write

So with this you get all the run commands which will help you.

Dont forget to g+1.
Thank you :)